LGB Stainz Decoder Fitting Guide
Introduction
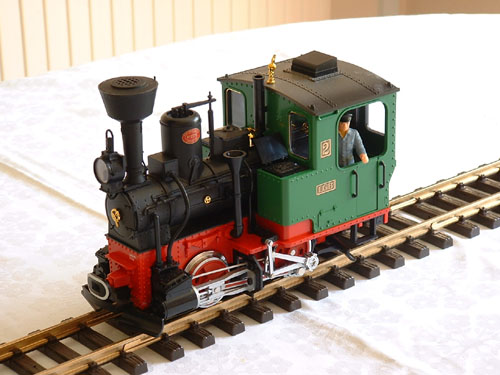
The Stainz is no doubt the most common LGB loco, thanks to it being in the majority of all starter sets produced. LGB has produced over a million of these rugged little locos, and now that digital control is becoming more common, this is naturally one of the first that needs to be converted.
The majority of all new locos produced by LGB now come with decoders fitted as standard, and are integral to the main circuit board (also containing features such as lights, sound, etc...). However, to keep costs down, while the Stainz present in the starter set has lights, sound and a sound generator, it does not have a digital decoder fitted. For a number of years now, these Stainz locos have had a "Direct Decoder" fitting, meaning that in theory at least, fitting the decoder is simply a matter of opening up the loco, plugging the decoder in, and you are up and running.
But!, just because this loco is common, does not mean that it is easy to get into! The actual position of the decoder socket is in the boiler of the loco, and to get to it takes time, patience, and knowing which screws to undo, which pieces need to be taken off, and in which order. This step by step guide explains all of the actions needed to get your Stainz running on Digital!
(Hint: If you click on most of the pictures, a larger image will open in a new window)
Lets take a look at the loco:
The first step once you have your loco is to make sure you have a decoder to fit in,

We are using the Mk2 decoder, an updated version of the Mk1 (which is no longer produced), reference number 55021. In the box you will find the decoder (in a protective cardboard cover), an instruction manual, a piece of double sided sticky tape, and a bag of connectors. Because this loco has a "Direct Decoder" fitting, the connectors, nor the tape are needed. In addition, the wires on the decoder are redundant, but we will come to that later.
Right, onto the disassembly.
Step 1: Removing the Body
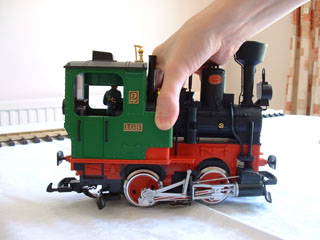
First, we need to separate the main body, from the chassis, containing the motor, gearbox, wheels and connecting rods.
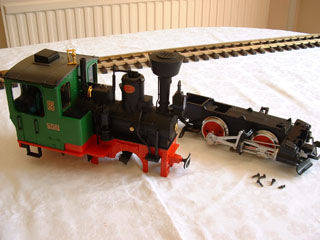
6 screws need to be removed, the first two keep the small rod at the side affixed to the red chassis plate by way of a black bracket. One small screw holds each in place on each side. The remaining 4 screws are larger, and are located at the front and rear, where the couplings attach. These are easily visible at the front of the loco where there is no hook on the coupler, but at the rear, the hook bar will need to be moved to one side to allow the screws to be visible from behind the spring.


Now the main body is only connected to the chassis by the wires that provide power to the motor, and from the electrical pick-ups on the wheels / shoes. So, lifting the body of the chassis is simply a case of holding the wheels, and easing the body off. Giving the body a little shake as you do so will free the body a little easier.
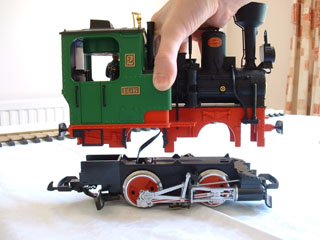
Placing the body on it's side, the connector going to the chassis can be prised off, either with your fingers, or the help of a small flat headed screwdriver.


We now have the chassis on it's own. This doesn't need to be touched until reassembly, so place it, together with the 6 screws to one side.
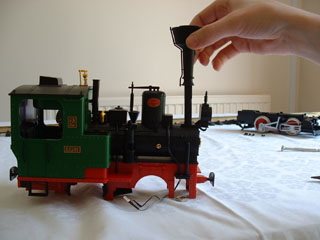
Step 2: Removing the Chimney
Next, the chimney needs to be removed. As can been seen from beneath, it is attached with a nut, with the wires to the smoke generated being fed through it. A pair of pliers need to be used to grip the nut, and give it a twist in the normal anti-clockwise direction to loosen it off. Once released a little, it is fairly easy to simply flick it with a finger to unscrew it completely (if you prefer you can continue to use the pliers, but it should spin fairly freely after a couple of turns).


To remove the chimney stack, the smoke generator needs to be disconnected from the loco. Following the wires across the main red base plate, the wires, (grey and black on our loco) are equipped with push connectors at the ends, and simply unplug from the circuit board. By holding each wire as close to the end as possible with your fingers, twisting the connector left and right as you pull, the connector should come off easily, without too much force. If you can't get your fingers into the small hole, you may use a pair of pliers once again, but try to grip the connector directly, to avoid stressing the wire.

Remove the tape from over the wires to allow them to hang below the chimney. At this point, you can take the nut off the wires and put it to one side. The chimney will now pull vertically upwards from the boiler of the loco, together with the lamp cover which can also be removed.

Also at this end of the loco, from where you just unscrewed the nut, the piece of plastic which has four pipes coming into it from above needs to be removed. These pipes are a fairly tight fit, and by pushing them out from below you pop them off, to take this piece out.

Placing the body the right way up once again, on the left hand side of the boiler, the water filler tube connects the red baseplate to the boiler. This is simply pushed in, and although a tight fit can be simply pulled off.


Now, only 4 more screws and the red base plate is no longer attached to the cab or boiler. These 4 screws are at the rear of the loco, and are ringed in this next picture. Remove these, and put them in a safe place.

Step 3: Separating the Cab
Now here is a tricky bit!. Although the cab is attached to the boiler, neither piece is now physically fixed to the base plate. However, the driver, with his arm out the side window prevents the cab from simply lifting off. It seems to me that the driver was probably glued in after the fitting of the cab, and as such the German assembly staff did not have this tricky problem we are now faced with when assembling/disassembling the loco. Aswell as his hand being out the cab window, his head is very close to the speaker on the roof of the cab which can prove problematic.
Here is my recommmendation of how to go about getting the driver out of the cab:
Tipping the whole body upside down while attempting to do this allows more movement of the baseplate as the weights in the coal bunkers just in front of the cab on either side stay within their slots.
Now, highly technical this, you have to jiggle the red base-plate, with the front coming towards you, as shown in the figure below:

This moves the driver towards the front of this cab where there is more room between his head and the curved speaker moulding. Also, you may need to push his hand into the cab to make sure it clears the window, while simultaneously still twisting the baseplate a bit! The first time i managed to get him out, i had an additional pair of hands 'on hand' to help, but the second time round you get the feel of what needs to be moved where, and you can usually do it on your own.
Having said that, you may be one of the lucky ones, whose driver does not need as much coaxing out as ours, if so, count yourself lucky!
With the basplate now separate from the cab and boiler place it to one side, together with the weights which will fall out of the cab. (N.B, it is worth noting which way up the weights go back in, to make reassembly that little bit quicker.)
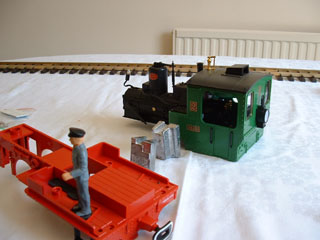
Step 4: Detaching the Boiler
Now the boiler can be dettached from the cab. The first step is to disconnect the small chimney in front of the cab from the cab itself. Pulling the top of the chimney towards the front of the loco, then twisting it to one side removes the small plug connecting it to the cab.

Next, turning the body over, you will notice that the boiler will rotate slightly in either direction with respect to the cab. By looking over the next few pictures, you can see how the boiler clips into the cab. To remove it, the gap where the boiler connects needs to be eased apart. One side will come out a little first, and with further easing of the cab, the other side will move up slightly. Still easing the cab apart, the boiler can be gently pulled and/or rocked out the rest of the way. This is a reasonably tight fit, so twisting as you pull helps.


Step 5: Fitting the Decoder
The boiler is now still conected to the cab via 3 sets of wires, we shall remove these in a moment. First unscrew the screw holding the water pump in place, and remove the pump.
Now the bottom half of the boilder can be popped off. There are two lugs on either side and by easing the covering plastic (part of the top half of the boiler), outwards, the bottom just drops off. doing one side at a time makes this slightly easier.

You can now remove the wires connecting the cab to the boiler. All 3 simply pull out.
Nearly there, two screws hold the weight to the top half of the boilder, and undoing these the weight drops out, revealing the circuit board. Finally!


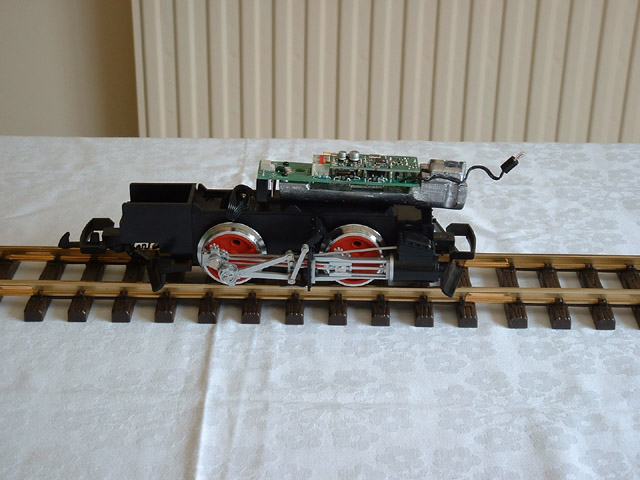
Now lets get down to the real stuff, actually physically fitting the decoder! Thanks to the direct socket provided by LGB on the circuit board there really is nothing to it. Shown below is the circuit board and the decoder. (Note: the wires are not needed and are cut off.)


Offer up the decoder to the main circuit board, (it only goes on way) and press down firmly to fix the decoder in place.


In order for the main circuit board to know there is a decoder present, all the 'dip' switches need to be switched to the position shown below as per the manual:

Now, you have probably spent a fair few minutes trying to get into the very innards of the loco it is wise to check that the decoder works before re-assembly. Simply connect the main wire that goes to the rolling chassis, and place your 'half-a-loco' on the track. Below i've checked the light function works, and also gave it a bit of exercise running up and down a 4' length of track:

If your loco refuses to do anything, check the decoder is pushed down firmly, the dip switches are correctly set, and the circuit boards are getting power from the track.
And now all that remains is the reconstruction of the loco. There are no hidden steps in this, a simple reversal of the instructions used to dismantle the loco will result in a MTS ready loco.
Happy Running!

